In this post, I’ll introduce you to Docker Compose support for Spring Boot applications. This allows you to deliver locally your repository layer using a simple Docker Compose file.
To make the whole thing more practical, I have prepared a very simplified example application. So you can follow every step hands-on and test it directly yourself.
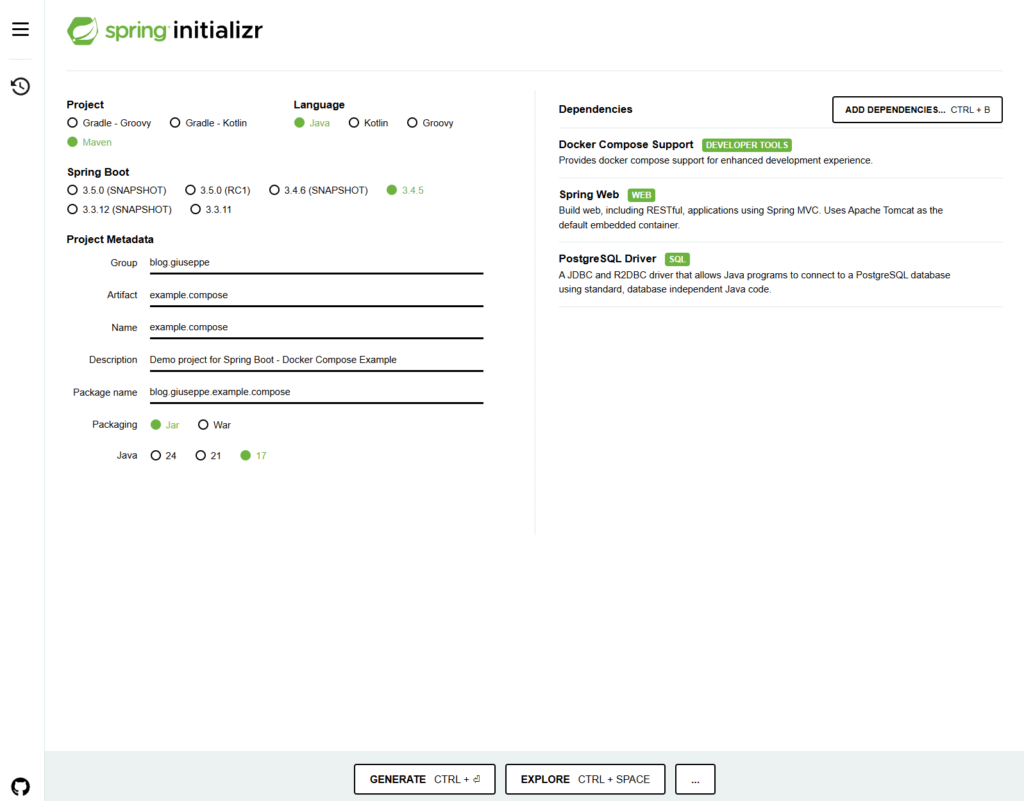
Project Setup Using Spring Initializr
To quickly create an initial project, https://start.spring.io/ is a great tool. The Spring Initializr lets you search for dependencies and provides a basic project structure, which can then be downloaded as a ZIP file.
Required Dependencies
For our example project, we need the following dependencies:
- Docker Compose support
- PostgreSQL driver
I’m using PostgreSQL for this project, so I need the corresponding driver. If you choose another database, you’ll need to select the appropriate driver accordingly.
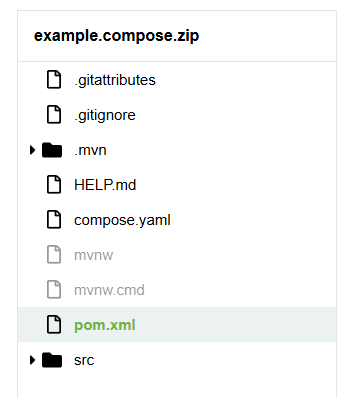
Clicking the “Explore” button shows the generated project structure.
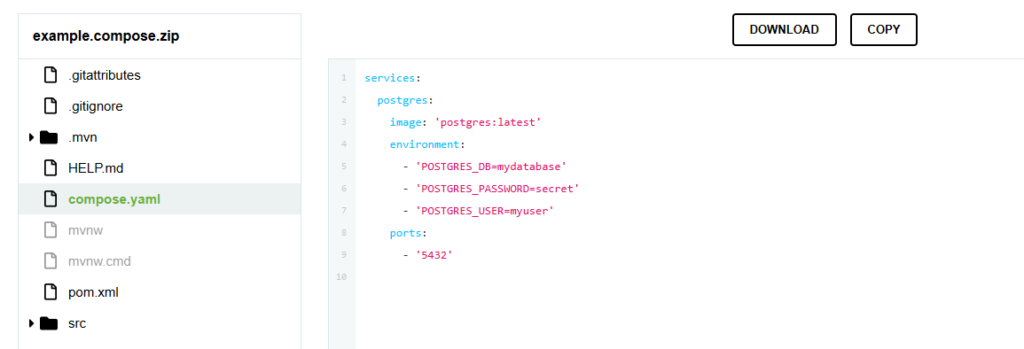
The compose.yaml File
In the root directory, you’ll find the compose.yaml file. It already contains the configuration needed to launch, for example, the PostgreSQL database. Spring Initializr automatically detected the need for this configuration based on the selected driver and set it up accordingly. Of course, you can customize it — for example, change the image tag, environment variables, or port settings.
Configuration via Application Properties
If you want to change the name or location of the file, you can do this using the spring.docker.compose.file property. (You can find more Properites in the official documentation.)

Starting the Application
Before we can start the Spring Boot application, we need to ensure that Docker is installed and running on the host system.
Application Output and Container Status
After starting the application, we can see from the logs that the Docker Compose file is being used:
Using Docker Compose file C:\Users\Admin\IdeaProjects\example.compose\compose\dev\docker-compose.yamlWe also see that the PostgreSQL container was successfully created, started, and marked as healthy:
INFO  DockerCli   :  Container dev-postgres-1  Created
INFO  DockerCli   :  Container dev-postgres-1  Starting
INFO  DockerCli   :  Container dev-postgres-1  Started
INFO  DockerCli   :  Container dev-postgres-1  Waiting
INFO  DockerCli   :  Container dev-postgres-1  Healthy
Verifying with Docker CLI
Running “docker ps” confirms that the container is running and exposed on a specific port.

Leave a Reply